|
CRL1000L Installation start:
Kit Battery Lead insertion (for PC-8 and 3CS Kits)
Remove bike’s rider seat. Make sure there is no fuse in the Kit’s main fuseholder.
Start by inserting the POS lead under the bracket as shown below.
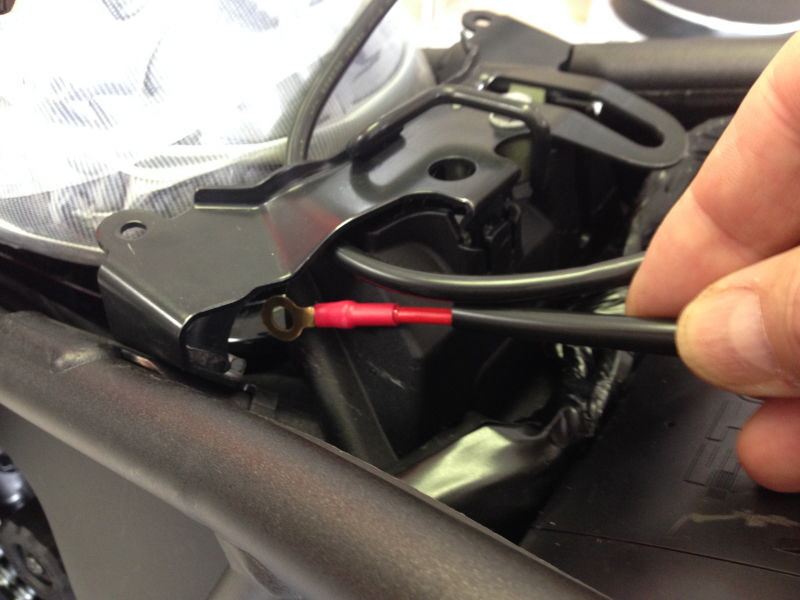
Now route it as shown below to the battery. Repeat with Kit’s NEG lead.
Note the use of painters tape to protect areas you’re working on.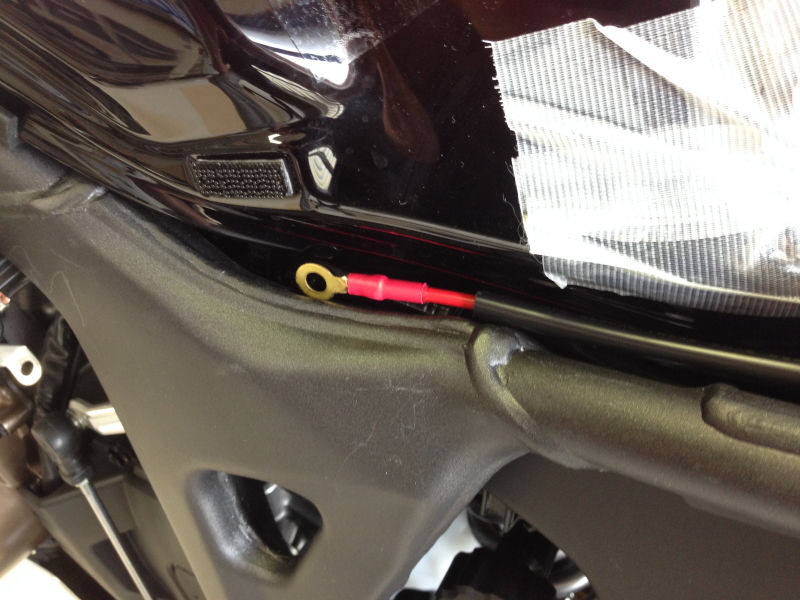
Also note the minute scratches above in the frame. A wipe with an oily rag and they don’t show, but be careful and tape everywhere you can about.
Battery Cable Install
Remove the toolbox, your battery is behind it. then release and flip up the plastic cover and you’ll see the view below. Slide the battery partially out.
Unbolt the battery NEG cable on the right side with a 5mm allen tool. Pull the cable out enough so it won’t touch the frame.
Now unbolt the battery POS cable on the left, you’ll need a 10mm wrench.
Now is the time to pull the Kit’s leads into position. Keep the bike’s NEG lead from touching anything.
Now bolt the Kit’s POS lead as shown below and tighten the 10mm bolt with the Kit’s lead slightly up as shown.
The Kit’s NEG lead can now be bolted down on top of the bike’s NEG lead.
Route wires neatly to the upper right indent.
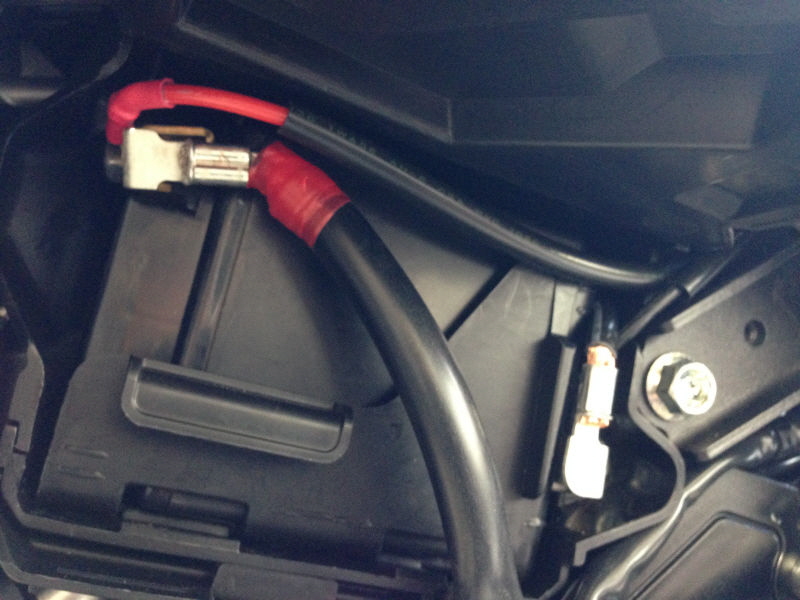
Now slide the battery all the way back into place and close the plastic cover, you’re done here.
Under the seat you will attach with 3 provided nuts, the Kit’s 3 PC-8 leads onto the 3 studs on the PC-8
Use velcro or duallock to secure the PC-8 into the desired position. It can go at the very front of the underseat tray, or it can go further back, your choice.
Please Note - all CRF1000 PC8 and 3CS Kits now use the 6P connector found at far rear left under passenger seat. Older Kits used the 4P connector on the right side under rider seat.
Older Kits (before 6/22/2017): The Kit has a 4P sealed connector which is inserted into the bike’s red connector lying along the right side. Remove the red cap and insert the Kit’s switching connector. This provides switching and ground for the relay.
New Kits (after 6/22/2017): The new Kit uses the 6P accessory connector which is for the factory alarm system. If you have the factory alarm you will also need to purchase our Rear Accessory Splitter. The 6P connector is located at the far left under the passenger seat. After removing the seat, pull up the connector and remove its cap. Then plug in the PC-8 switching connector to it. It can be routed further forward so its not under the passenger seat.
PC-8 Kit Switching Connector
|
Please Note - all CRF1000 PC8 and 3CS Kits now use the 6P connector found at far rear left under passenger seat. Slice the tape to free the connector, then remove the cap.
|
|
|
 |
|
|
|
|
|
|
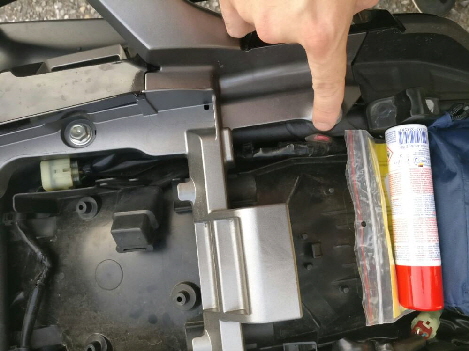
You can move it further forward to be accessible under the rider’s seat. Move it to a position shown by the finger below.
|
|
|
 |
|
|
FINISHING UP
Tie everything in place.
Now you can simply wire in all your circuit wires to the PC-8.
Run wires from the device to the PC-8 first.
On the PC-8, to insert a wire unscrew the desired screw on the PC-8 terminal block, strip the wire and insert making sure all wire strands go in. Then tighten the screw. Repeat for all circuit wires. POS wires go on the fuse side, NEG ground wires on the opposite side.
Fuse each circuit appropriately, according to the wire sizes used and the current requirements.
When you’re finished tie everything down and insert the main fuse, test that your circuits work.
PC-8 Install Pics
NOTES: - The relay can be placed along the left frame tube as shown here on the left, or it can go in other places, just keep everything away from the seat lock down loop. The PC-8 can be velcroed onto the central area giving lots of room around it for wiring.
Please send me some pics of your install so I can put them here.
This install shows the old style 4P connector and is the tidiest install I’ve ever seen. Something to shoot for.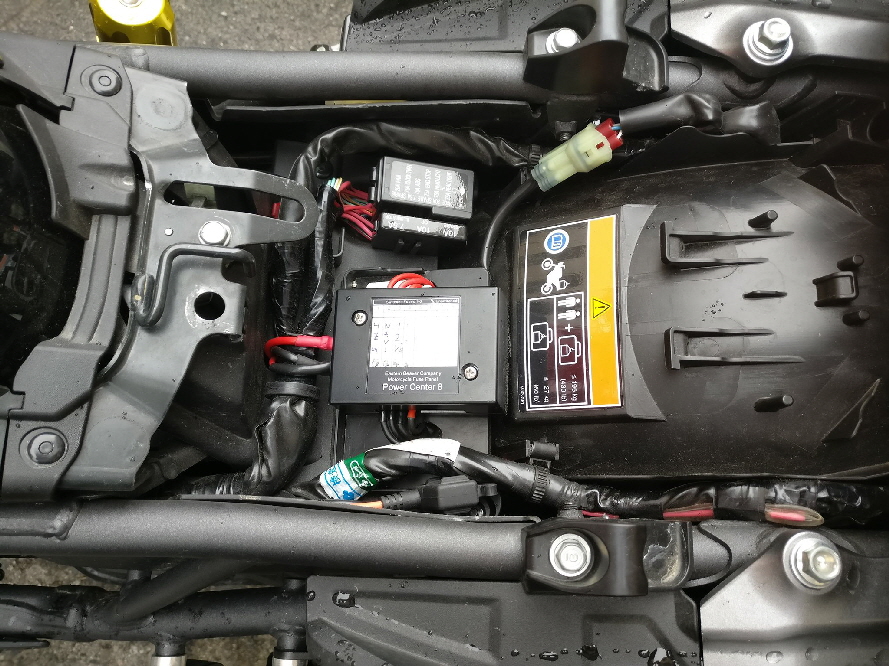
4CS Install
Battery lead installation is the same as for the PC-8 shown above, please follow the above instructions carefully to safely hookup this Kit to the battery correctly. The 4CS components can be laid out and tied down in many different ways, according to the space you have and the direction the wires to your accessories will run. Just keep them away from the seat loop latch area, or any places they could get pinched or worn.
On your circuit wires to your accessorieiis, you can install the mating connectors included with the Kit for a direct plug in that is sealed. Also I sell crimpers and the the Hozan P-706 is perfect for these sealed type terminals. We also have Kits using Posi-Locks so no crimping or soldering is needed. Or you can cut the connectors off and use another type of splice, solder, etc. Not everyone wants to buy a crimper to install this Kit bit if you can solder, it is very easy to install the mating sealed connectors on your wires. See this page for some help with the sealed connectors.
Once you get the main battery leads in place as shown above on this page, you’ll be left with the relay to secure, and the 4 output connectors. The 6P connector plugs into the connector as shown above. Before installing any fuses get everything else installed, then go back over everything and then test with fuses. The components are very flexible as to mount position but after all your circuits are wired and plugged in, secure everything with cable ties. Label all circuits if possible, you can write on the top of the white fuseholders as to what that fuse controls and fuse size you are using.
Install Instructions for CFT1000 Brake/Tail Adapters - please read all
- remove rider and passenger seats
- unplug the connector on tail light housing. Plus it into its mate on the adapter. Now plug the remaining connector on the adapter into the tail light housing
- attach your aux wires to the outputs - make sure no wires can short to ground if they’re not used
Version 1 - all wires are take-offs from stock wires
Version 2 - blue and black wires are take-offs. Red wire is output to brakelight, purple is input to brakelight modulator
To access the stock brake/tail light connector - you will have to remove the parts shown below.
The stock brake/tail light connector is shown below. The brake/tail adapter will plug into the tail light AND the stock connector to give you the ability to hookup aux brake or tail lights or brakelight modulators. Watch out for the sharp bits :)

Some brakelight modulators are plug and play as shown below. You don’t need this adapter for this type of modulator but if you want to use it AND be able to hookup aux tail lighting you can use Adapter Version 1 and still plug in the modulator as shown below.
This unit is a Supabrake II. I am trying to get the maker to offer a plug and play model for the CRF1000 soon.

Install Instructions for CRF1000 Signal Adapters - please read all
- remove rider and passenger seats

Basically this is just to show you where the stock connectors are. They unclip from the mounting and you can unplug the stock signals (smaller female halves) and plug in after market, replacements, or long leads if you need them.
Orange and blue are the signals, the white connector is for the licence plate light. Green wires are ground on all Hondas. I use black for grounds.
|